Last Updated on May 23, 2024 by Justin Williams
If you can’t afford an electrical dehumidifier, build a DIY rock salt dehumidifier
Preventing mold and mildew growth is a never-ending battle and you may not be able to purchase a top-rated dehumidifier right now. But there are homemade remedies to reduce indoor humidity levels that are affordable that you can do to escape those hot humid summer nights.
Even a homemade dehumidifier will help you remove excess moisture from the air effectively as long as you follow the instructions correctly. Through this article, you will learn how to make your own dehumidifier the easiest way.
The Materials and Tools You Will Need to Build a Dehumidifier
To make the best homemade dehumidifier possible, you need the right materials and use the right tools. Here is a list of those items so you can protect your home without spending a lot of money:
- A power drill
- One fan
- Tin snips
- Rock Salt (you can replace it with other moisture absorbers as you want, like calcium chloride or silica gel)
- 2 Buckets
- 1 Stand
- One pen
- A hygrometer
- A screwdriver
- Netting or chicken wire
How to Make Homemade Dehumidifier – the Steps to Follow
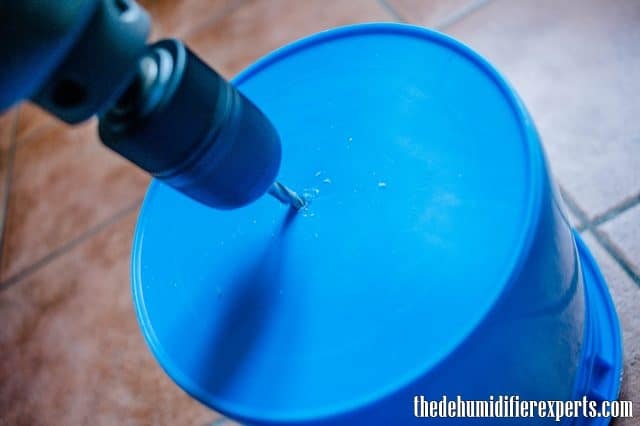
The first step to build your own dehumidifier is to take your electric drill and drill a 1/4 inch hole in the bottom of one of the medium sized buckets. It is a good idea to wear gloves and safety goggles while you work. Your safety is important.
Next, measure the chicken wire or netting making sure it is large enough to cover the bottom of the bucket and the hole you just created. Cut the wire or netting with your tin snips or scissors.

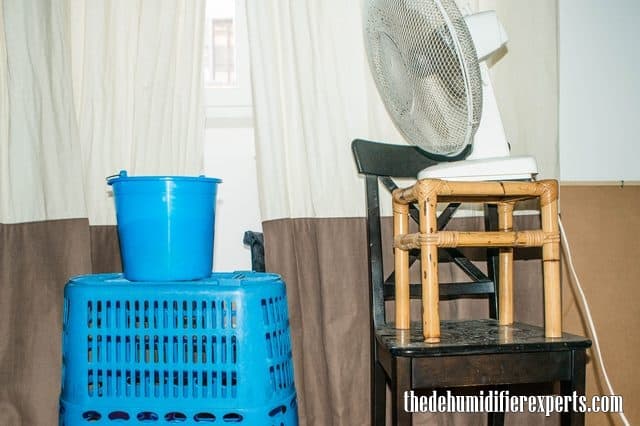
Once that is done and the wire is covering the hole, fill the top bucket with rock salt or any desiccant which can absorb moisture in the air. Place it on the stand. The stand can be an old laundry basket or something similar. As long as it has holes in the bottom for air flow, it should work as a stand. The stand’s height depends on the amount of space you have available for the homemade dehumidifier

Place the second bucket underneath the stand in line with the upper bucket and its hole. This bucket remains intact and no holes need to be drilled in it. The bottom bucket’s job is to catch the falling moisture

That is all there is to it. Your homemade dehumidifier is ready for action.
Some Helpful Tips in Using Your Homemade Dehumidifier
First, to get the most out of the natural dehumidifying process, you should give this homemade dehumidifier time to get working properly. It may be a day or two before you start to see some positive results.
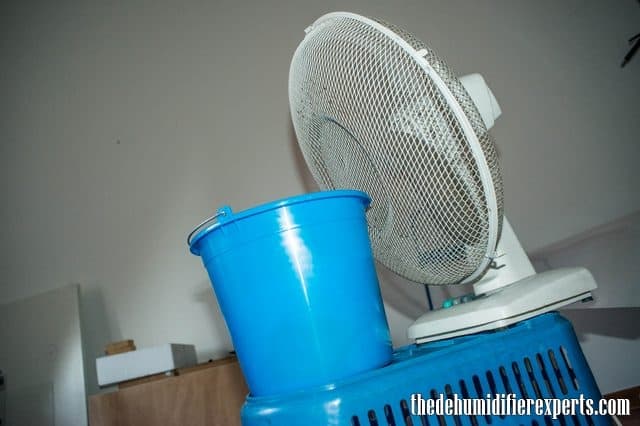
Second, you should use a box fan pointed at the dehumidifier to help with air flow and direct the humidity towards the unit. This works best in larger rooms. Your small rooms may not need this help.
Third, use the hygrometer to test the homemade dehumidifier’s effectiveness.

Fourth, to get better results, just increase the size of the buckets and the stand
Additional Tips: How to Dry a Room Without a Dehumidifier
Drying a room without a dehumidifier can be simpler than you think. Here’s a natural alternative to dehumidifiers:
Additionally, consider hanging up desiccant materials, like those silica gel packs that come with new shoes or electronics. They can absorb humidity in small areas like closets or bathrooms.
Remember, managing humidity doesn’t necessarily need a gadget—sometimes nature has the best solutions!
Final Words
Do it yourself projects can save you a lot of money. Dehumidifiers are not always found on the inexpensive side of pricing. The good part of this homemade dehumidifier is that it does not use any electricity unless you have to add the fan.
Plus, you can make this version out of normal everyday items you have lying around the house. Protecting you, your family and your home is easy when you are on a budget.
I don’t understand this article. are you not going to give guidance on the amount of salt? are you not going to reference the size of the chicken wire? Are the images meant to reflect what you used?? I have a hard time believing that arrangement was used for the process described above. if you’re just copy pasting from other articles, atleast try to make it uniquely helpful. This article just made it clear either many blogs are copy-pasting or there’s not a lot of knowledge of DIY dehumidifier solutions. why would you leave out critical information meant to guide people in your custom recommendation?
Hello,
Thank you for your question. We appreciate the feedback and will make adjustments to help clarify this article in the future. However, we are not able to give guidance on the amount of salt due to the fact that it is dependent on a number of variables such as room size, humidity, temperature, and location of the dehumidifier, among others.
The chicken wire size is also not being provided because it is really up to you. You can use whatever size is the most effective for your conditions, but I recommend not using too small of a gauge because you will find it very hard to handle.
The images are meant to provide a general idea of how the unit is built and what tools you will need. You can easily change it to fit your conditions.
We appreciate the feedback and will work to make the article more helpful with any future updates.